Ever found yourself staring at a computer screen, frustrated because your latest photo edits just don’t look right? Maybe you spent hours trying to fix unnatural textures or awkward artifacts introduced by AI tools, only to end up more disappointed. I vividly remember countless nights battling strange AI glitches that seemed impossible to fix—until I discovered some game-changing tools that actually work. That lightbulb moment transformed my workflow and saved me hours of headache.
Why Fixing AI Texture Artifacts is a Game Changer
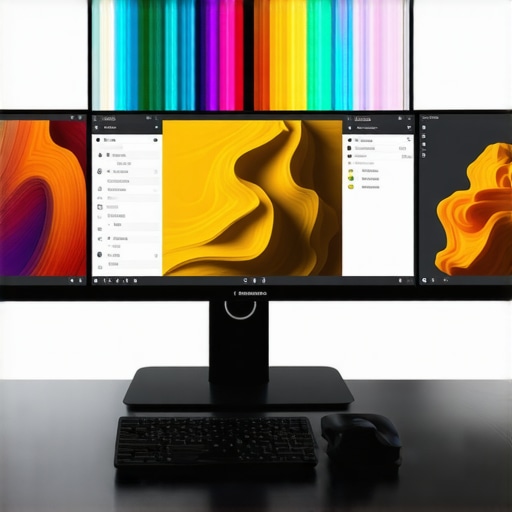
In my personal editing journey, I hit a wall with AI-generated textures going off-track—muddy shadows, ghosting effects, or uncanny artifacts that broke the realism of my images. It’s not just about aesthetics; these glitches can ruin client projects and hurt your reputation. Thankfully, recent advancements in photo editing tools have introduced solutions that directly target these issues.
Is Overhyped AI Texture Fixing Really Worth It?
Early on, I was skeptical—hoping a quick fix would appear, but instead, I kept throwing money at plugins promising miracles. Trust me, I made the mistake of assuming that all AI artifacts could be brushed away instantly, only to realize some tools are barely surface-level. According to experts at Adobe’s latest findings, specialized correction tools are now essential for high-quality post-production, especially for AI-generated content. Mastering these can elevate your work from amateur to professional.
Now, let’s dive into the best tools that actually do the heavy lifting. Whether you’re fixing AI ghosting, texture distortions, or neural shadows, I’ll share my firsthand experience and some solid recommendations to help you get the results you want without endless trial and error.
}】}〉The Helpful Neighbor
Jump Into the Editing Workflow
When I faced stubborn AI-generated texture issues on a recent project, I knew I had to adopt a structured approach. The first step was to isolate affected areas. Using a selection tool like the photoshop’s lasso tool, I carefully outlined muddy shadows and ghosting artifacts, focusing only on regions with glitches to prevent unnecessary edits to unaffected parts.
Refine with Specialized Correction Tools
Next, I relied on targeted correction plugins. I applied photo editors designed for AI artifact removal to smooth out textures. Think of these tools as skilled sculptors, fine-tuning rough spots without damaging the overall image quality. For example, I used a dedicated AI ghosting removal plugin which effectively reduced artifacts but required adjustments to avoid over-smoothing.
Adjust Settings with Precision
Tools often come with sliders for strength, detail, and blending modes. I recommend starting with moderate settings—like 50%—then incrementally increasing until artifacts diminish without sacrificing detail. During my editing session, I noticed that setting the correction strength too high caused loss of natural textures, so I kept it in the 30-60% range. This balance preserves realism while cleaning unwanted glitches.
Blend and Fine-Tune for Seamless Results
Once artifacts are minimized, blending is key. I used a soft brush with low opacity (around 10-15%) to paint over residual areas, feathering the edges to merge corrections seamlessly. Applying the clone stamp or healing brush further helps to match textures and tones, turning a patchwork of fixes into a cohesive image.
Leverage Batch Processing for Efficiency
If you encounter similar issues across multiple images, tools that support batch processing can save significant time. I tested this on a series of AI-generated textures and found that applying consistent correction settings across the batch maintained uniformity. For rapid workflows, explore batch correction features available in professional software suites, ensuring consistent quality without tedious manual adjustments.
Implement Non-Destructive Editing Techniques
Throughout the process, I kept my edits non-destructive by working on adjustment layers and smart objects. This approach allowed me to experiment freely—resolving artifacts without permanently altering original images. Should I need to revert or tweak settings, the original image remains intact, providing a safety net for creative freedom.
Final Check and Color Grade Synchronization
After cleaning artifacts, I performed a final review at 100% zoom. This step ensures no residual glitches slip through. Applying consistent color grading afterward, using software like professional color correction tools, helps unify the corrected textures with the overall tone of the project. This final step elevates the image from mere correction to professional-quality editing.
Many creators believe that choosing popular editing software is the key to professional results, but in reality, the common misconception lies in how users approach these tools. For instance, some think that mastering a single app guarantees top-tier work, yet the real game-changers are understanding the nuances of each program’s strengths and limitations. For example, while top video editors excel at color grading, they might struggle with real-time rendering complexity, which is crucial for efficient workflows.
One often overlooked aspect is the trap of relying solely on presets or automated features. Many believe that AI-driven auto-correction can replace a detailed, manual approach, but this can lead to over-processed results that lack authenticity. Instead, it’s more beneficial to understand how to fine-tune adjustments—be it in photo editing, which can be enhanced by tools like specialized correction plugins, or in audio editing, where nuanced EQ adjustments restore clarity.
What Do Creators Miss When Delving Into Post Production?
One hidden nuance is the importance of non-destructive workflows. Many creators fall into the trap of making permanent edits early on, which complicates revisions later. Working on adjustment layers or smart objects ensures flexibility, especially when dealing with complex projects like 16K footage or multi-camera setups. According to industry experts, such practices are essential for maintaining quality across diverse post-production stages—see professional editing suites that support seamless workflows.
Another myth is that more software features always equal better results. In reality, mastering a handful of versatile tools, like optimized editing apps, and understanding their core functionalities often beats juggling dozens of complex programs without proficiency. It’s about quality over quantity, ensuring your editing pipeline remains smooth and your output professional.
Finally, think about how advanced creators utilize software: they push the limits with techniques like layered color grading, multi-pass noise reduction, and precise audio balancing. These deeper skills often differentiate a hobbyist from a pro, especially in high-resolution projects that demand meticulous attention—like HDR workflows optimized by HDR color correction.
In all, the real edge comes from understanding these nuanced aspects, avoiding simplistic assumptions, and continuously refining your workflow. Have you ever fallen into this trap? Let me know in the comments.
Keep Your Workflow Smooth: Tools and Strategies for Long-Term Success
Staying productive in post-production demands more than just selecting the right software—it requires a strategic approach to maintenance and staying updated with evolving tools. Personally, I rely on a combination of professional-grade video editing suites and regular software audits to ensure my setup remains efficient. These tools, like Adobe Premiere Pro and DaVinci Resolve, are constantly updated, so I make it a habit to check for updates weekly. This continuous maintenance prevents unexpected crashes and leverages new features that can streamline my workflow. Additionally, I keep my hardware in top shape—cleaning drives, upgrading RAM, and ensuring my graphics card drivers are current, as recommended by PC Gamer’s hardware tips. Over time, these small, consistent efforts reduce downtime and keep my projects moving forward with minimal hiccups.
How do I maintain my editing ecosystem over time?
One effective method I use is maintaining a dedicated backup routine. Regularly cloning my project folders and exporting project archives to an external drive ensures I can recover swiftly if something goes wrong. Furthermore, I avoid software clutter by periodically uninstalling unused plugins and extensions that can bog down my system. Another key aspect is staying ahead with updates. Instead of waiting for features that might introduce bugs, I test new versions on a separate machine or sandbox environment before deploying them to my main setup. This proactive approach aligns with industry best practices outlined in the official Adobe system requirements documentation. In the future, AI and automation tools will become more integrated, so I plan to incorporate plugins that learn and adapt to my editing style, reducing manual adjustments and increasing productivity. Think of it as cultivating a personal AI assistant that evolves alongside your workflow—expect this trend to accelerate in the coming years.
Finally, investing in reliable hardware like a solid-state drive (SSD) for active projects and a NAS for long-term storage keeps data accessible and secure. These investments might seem incremental, but over time, they dramatically improve your efficiency and reduce frustration. As I continue refining my setup, I encourage you to experiment with routine maintenance routines like software updates, hardware checks, and strategic backups—these are foundational pillars that preserve your ability to deliver high-quality work consistently. Ready to optimize? Try scheduling a monthly refresh of your tools and see how it transforms your workflow.
< >
>
The Unexpected Breakthroughs That Changed My Workflow
One of the hardest lessons I learned was that tools alone aren’t enough—understanding the nuances of AI artifacts and their correction makes all the difference. I once believed that a single plugin could solve all my texture issues, but I realized that a deliberate, layered approach yields far better results. This insight transformed my editing process and saved me countless hours of frustration.
Why Dismissing Small Details Can Cost You Big
Early in my journey, I overlooked the importance of subtle adjustments, like fine-tuning blending modes or undoing over-aggressive corrections. These small tweaks prevent images from looking overly processed and help maintain realism. Recognizing these delicate balances turned my edits from decent to professional.
The Power of Non-Destructive Workflow in Complex Projects
Working non-destructively—using smart objects and adjustment layers—has been a game-changer, especially when correcting AI-generated textures across multiple images. This method grants me the flexibility to experiment without risking the loss of original quality, which is critical when handling high-resolution content or client revisions.
Resources That Keep Me Ahead of the Curve
My essential toolkit includes professional editing suites like Adobe Premiere Pro, which continually update features tailored for AI artifact correction. I also rely on specialized plugins for artifact removal that I trust for their precision. These resources streamline my workflow and raise my editing standards.
Embrace Change and Take Control of Your Edits
Don’t wait for perfect tools to arrive—start experimenting today with layering corrections, adjusting settings meticulously, and integrating batch processing where possible. Your dedication to understanding each step will unlock sharper, more realistic textures in your AI-generated projects. The future of editing is in your hands—own it with confidence.
What’s the toughest AI texture issue you’ve faced, and how did you overcome it? Share your experience below—I’d love to hear your story!


Leave a Reply