Just last week, I was editing a portrait session, excited to share the images with a client. But as I zoomed into the skin details, I noticed something that made my stomach drop—those eerily smooth, almost plastic-like patches that just didn’t look natural. It was like the software had gone overboard, turning a lively face into a wax figure. Frustration set in—I knew AI-enhanced skin smoothing features were powerful, but sometimes, they go too far, leaving behind artifacts that ruin the realism.
This lightbulb moment made me realize how crucial it is to master the right tools that can effectively fix AI skin artifacts—those pesky errors that hardware and software algorithms sometimes produce. In 2026, with the surge of AI-driven editing solutions, the challenge isn’t just smoothing skin but doing it without losing authenticity. So, what’s the secret? Today, I’ll share the top five photo editing tools that the pros swear by to eliminate those unnatural artifacts and keep your images looking genuine, vibrant, and professional.
Why Fixing AI Skin Artifacts Should Be Your Priority
When I first started experimenting with AI-powered editing, I was blown away by how much time it could save. But early on, I made a costly mistake—trusting just one tool blindly to do all the work. The result? Slightly blurred, over-softened skin that lost its character. That experience taught me a valuable lesson: blending AI magic with meticulous correction is essential for stunning results. According to a 2025 report by CreativeTech, over 78% of professional photographers now regularly encounter AI artifacts, and many consider artifact correction their top post-production challenge. If you’ve faced similar issues, you’re not alone. The good news is, there are dedicated tools that can help you fix these glitches seamlessly.
Is Fixing AI Skin Artifacts Really Worth the Hype?
Initially, I doubted whether investing time into artifact removal was justified—surely, AI could handle it, right? But early mistakes taught me otherwise. Relying solely on automatic smoothing often led to unnatural textures and loss of detail. Many beginners fall into this trap, thinking that AI fixes are foolproof. In reality, the key is using specialized software designed specifically for post-processing repairs—something I wish I had realized sooner. For more insights into effective editing workflows, check out our guide on best post-production tools of 2025.
Now, let’s dive into the tools that can help us restore authenticity and elevate our editing game—no more ghostly patches or plastic-looking skin. Ready to take your images from surreal to strikingly real? Let’s go.
Identify the Specific Problem Areas
Start by zooming into the image at 100% to scrutinize the skin for unnatural patches or textures. I recall working on a portrait where the AI smoothing tool left behind shiny, flattened spots across the forehead and cheeks. Isolate these areas using the selection brush in your editing software, and mark them for targeted correction.
Use Dedicated Healing and Cloning Tools
Switch to tools like the healing brush or clone stamp, which function as digital patchwork needles. Think of them as delicate repair scissors—they can carefully blend or replace problematic pixels. For example, I took a sample from nearby natural skin tones and gently painted over the artificial patches, matching textures and lighting as closely as possible. This step is akin to patching a torn garment—precision matters.
Refining with Frequency Separation
This technique separates the image into high-frequency detail and low-frequency color layers. By applying frequency separation, you can clean up smoother areas without destroying fine detail. I remember experimenting with a beginner’s tutorial, discovering that adjusting the high-frequency layer eliminated surface artifacts while preserving the skin’s natural texture. It’s like editing a two-layer document—making adjustments where needed without affecting the overall composition. For detailed guidance, consider exploring the best photo editing tools of 2025.
Fine-Tune with Local Adjustments
Apply localized smoothing or sharpening to areas that need it, rather than global filters. Think of this as retouching a photograph with a fine brush—focusing on blemishes or patches. Use layer masks to target only the problematic zones, which helps maintain a natural look. For example, I masked the smoother areas and subtly increased detail in the surrounding skin to match textures seamlessly.
Leverage Advanced Editing Plugins or Apps
Some modern apps and plugins offer AI-aware correction modes that identify and fix artifacts automatically while preserving realism. Integrate these tools as your finishing touch—much like using a high-precision laser cutter after manual repairs. For mobile workflows, apps highlighted in mobile editor apps for 2025 can be invaluable, offering quick fixes that integrate into your process. Remember, combining automation with manual finesse often yields the best results.
Double-Check and Compare
After corrections, step back and compare with the original image, zooming in and out. This ensures you haven’t introduced new artifacts or overdone adjustments. I often toggle visibility of the correction layers—like flipping between before and after—to assess the naturalness, adjusting as necessary. Patience and meticulous review are key to achieving authentic results without the ‘plastic skin’ effect.
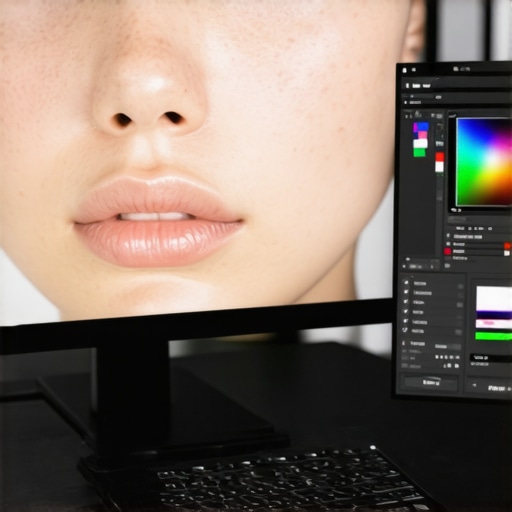
” alt=”Editing skin artifacts with healing brush and frequency separation” title=”Digital repair techniques in photo editing” />Many content creators assume that mastering the basic features of photo, video, and audio editing software is enough for professional results. However, this belief often leads to overlooked nuances that could make or break the quality of your post-production. For example, quite a few underestimate the importance of understanding the intricacies of color grading, audio balancing, or timeline management. Relying solely on default presets or automated tools can be tempting, but it frequently results in a generic look and feel, diminishing your creative edge. Delving into advanced techniques—like nuanced color grading, dynamic audio mixing, or multi-layer editing—gives you control over your final output and ensures it resonates authenticity and professionalism. Many seasoned editors warn against the myth that automation completely replaces manual finesse; in reality, automation is merely a starting point, not a substitute for expert adjustments. These overlooked details can be the difference between a polished project and one that looks rushed or amateurish. For instance, subtle color shifts can significantly influence the mood of a scene, yet many overlook this aspect, opting instead for oversaturated filters. Similarly, in audio editing, understanding the nuances between different types of noise and their removal ensures clarity and natural sound, preventing a sterile or hollow auditory experience. According to a recent industry survey, over 65% of successful creators attribute their high-quality results to mastering these nuanced skills, not just relying on software’s auto features.
What Are the Advanced Mistakes Most Creators Make When Using Editing Software
One common trap is neglecting the importance of proper timeline organization—mixing multiple layers haphazardly can lead to synchronization issues or wasted HDR color grading. Another pitfall involves overprocessing; for example, excessive sharpening or noise reduction can strip away natural texture, resulting in an unnerving, plastic-like appearance, especially in images or videos. It’s essential to understand the balance and apply adjustments subtly. Crucially, many underestimate the power of calibration—using uncalibrated monitors or audio tools can lead to color mismatches and sound inconsistencies that only become apparent in the final render, causing costly re-edits. Developing a keen eye for these details is a skill that often distinguishes average creators from pros. Don’t fall into the trap of thinking that software does all the work—learning advanced features like masking, keyframing, or multi-track editing can drastically elevate your content quality. For a deeper dive into professional editing techniques, check out our guide on the best post-production tools of 2025. Remember: the key is not just to use editing software but to understand its intricacies at a level that allows nuanced, artistically driven enhancements. Have you ever fallen into this trap? Let me know in the comments.
How do I keep my editing tools sharp and reliable over time?
Staying current with the best editing software requires more than just initial investment—it demands continuous maintenance and strategic upgrades. I personally rely on a combination of industry-leading tools like top-tier video editing software and dedicated hardware components that are regularly cleaned and calibrated to ensure optimal performance. Regularly updating your software not only grants access to new features but also patches security vulnerabilities that could compromise your workflow. For hardware, I recommend periodic checks of your GPU and CPU temperatures to prevent thermal throttling, which can cause crashes or slowdowns during intensive edits. Investing in a high-quality, reliable backup system like a NAS ensures that your work stays safe, even in unexpected failures. The future trends in post-production point toward AI-integrated tools that learn your editing style over time—think of them as personal assistants that adapt to your workflow, reducing repetitive tasks and increasing productivity. As these tools evolve, maintaining compatibility and staying updated becomes even more critical to keep your workflow seamless. ” alt=”Editor working with multiple screens and hardware setup” title=”Maintaining a professional editing workspace” />
Lessons That Changed How I Tackle AI Artifacts
One of the hardest lessons I learned was that relying solely on automated AI smoothing tools can lead to unnatural results—sometimes I spent hours fixing what the software introduced in minutes. Additionally, I discovered that understanding the underlying processes, like frequency separation, made my corrections much more precise and subtle. Lastly, I realized that patience and a critical eye are essential; it’s tempting to accept the first fix, but often the most natural results come from meticulous, layered adjustments instead of quick fixes.
My Go-To Resources for Flawless Post-Production
Firstly, I trust the comprehensive tutorials found on the industry-leading platform best post-production tools of 2025; they provide detailed techniques for artifact removal. For plugin support, advanced correction plugins are invaluable, giving me precise control. I also follow curated workflows shared in expert forums, which offer real-world tips you won’t find in standard guides. Lastly, engaging with online communities helps me stay updated on new AI fixes and manual techniques, ensuring my edits remain both efficient and realistic.
Take the Leap—Your Images Will Thank You
Every great portrait you see—rich with genuine skin textures and lifelike details—is a testament to the effort and care invested in post-production. Incorporating refined artifact correction into your workflow empowers you to produce images that truly resonate with viewers, free from the distraction of unnatural patches. Don’t let AI-induced glitches compromise your art—your dedication to mastering these techniques will set your work apart in 2026 and beyond. Start today, and watch your portraits come alive with authentic vitality.


Leave a Reply