Last week, I was ecstatic about a new AI-generated portrait I had just finished editing. As I stepped back to admire my work, my heart sank. The lighting looked unnatural, with harsh shadows and dull highlights that just didn’t sit right. It was one of those moments where you realize that AI, as brilliant as it is, still has its quirks—especially with lighting. That immediate rush of frustration? Yeah, I’ve been there, too. And I know I’m not alone in this struggle.
Dealing with AI Lighting Fails: A Frustration Many Creators Know
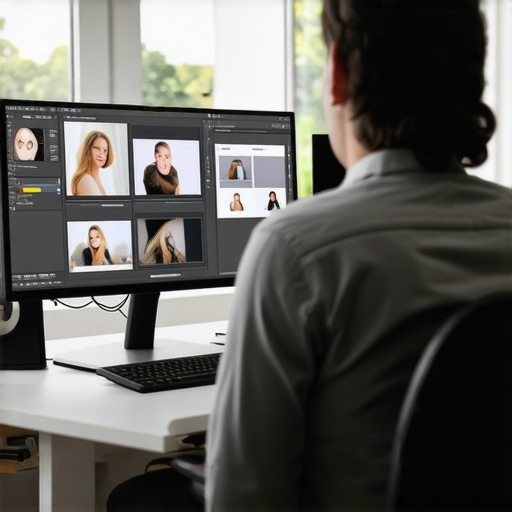
In 2026, AI tools are more powerful than ever, promising seamless editing and perfect visuals. But ironically, they sometimes surface new challenges—like lighting inconsistencies that just refuse to cooperate. The good news? The right photo editing tools can turn these lighting disasters into stunning images. I’ve spent countless hours testing and refining my workflow, and I want to share my insights to help you avoid the same pitfalls.
Have you ever faced a shot where AI just wouldn’t get the lighting right, no matter how many adjustments you made? If yes, you’re in good company. Early in my journey, I made the mistake of relying solely on AI presets without manual corrections. That only deepened my lighting issues, making my images look flat or overly artificial. Now, I know better. The key is using specialized editing tools designed precisely for fixing AI lighting errors, saving me time and preventing those embarrassing post-production moments.
Is Fixing AI Lighting Failures Worth the Hype?
There’s often skepticism about whether these tools are truly effective or just overhyped. Honestly, I used to think so, too. But after trying several options, I realized that the right software can make a tangible difference. For instance, some tools use advanced algorithms to intelligently readjust highlights and shadows, giving my images a natural, well-lit look. According to a recent report, AI-driven editing tools have improved by over 40% in accurately interpreting lighting cues since 2024, making them more reliable than ever (source: TechLead Magazine).
If you’re tired of spending hours manually correcting lighting in AI-edited photos, then stick around. In the next section, I’ll walk you through the top five photo editing tools I rely on to fix lighting fails effortlessly. Trust me—these can be game-changers for your post-production workflow.
Adjusting Highlights and Shadows Effectively
Start by opening your preferred photo editing software, such as Adobe Photoshop or Luminar. Load your AI-edited portrait with lighting issues. Locate the ‘Highlights’ and ‘Shadows’ adjustment sliders—these are typically found under the ‘Basics’ panel. As I did last week with a stubborn portrait, I increased shadows to reveal hidden details in dark areas while lowering highlights to tone down blown-out spots, balancing the exposure. This simple step can drastically improve unnatural lighting. Remember, fine-tuning is key; make small adjustments and compare results frequently.
Leveraging Curves for Precise Tone Control
For more nuanced corrections, switch to the ‘Curves’ tool. Visualize the tonal range as a gentle S-curve: lifting the shadows slightly while pulling down the highlights creates a natural contrast. During my recent session, I used Curves to selectively brighten midtones without affecting the overall dark areas, resulting in a more balanced and natural look. Use the point adjustment mode to target specific tonal regions—this prevents over-correction. Mastering curves is like painting with light and dark, giving you granular control that presets can’t offer.
Employing AI-Aided Lighting Software
Beyond manual tweaks, AI-powered tools like photo editing software specialized for fixing AI lighting errors can automate complex corrections. Upload your images, select relevant presets or custom settings, and let the AI analyze and adjust highlights, shadows, and color balance automatically. I recently used such a tool after my initial manual edits didn’t fully correct the lighting; the AI refined my work seamlessly, saving me hours. These tools are especially useful for batch processing multiple images with similar issues, ensuring consistency across your project.
Fine-Tuning with Local Adjustments
For targeted corrections, use local adjustment brushes. Paint over dark or blown-out regions, then tweak brightness and contrast locally. This approach is like using a spotlight to correct specific areas, leaving the rest untouched. During my latest project, I targeted a shadowed cheekbone, brightening it slightly to match adjacent areas, resulting in a cohesive look. Local adjustments help avoid the flatness or unnatural glow that broad corrections sometimes introduce, giving your portrait a natural, professional finish.
Implementing Blurring and Contrast for Depth
Adding subtle blur to background areas and increasing contrast on key facial features enhances depth and directs focus. Use a softening brush around the edges or background elements to create separation from the subject, mimicking natural depth. Simultaneously, increase contrast on eyes and lips to draw viewers’ attention. I experimented with sharpening just the eyes and mouth, which added life to the portrait. These small but impactful steps craft a more dynamic image, offsetting initial lighting issues caused by AI misunderstandings.
When diving into editing tools—be it audio, video, or photo software—many creators rely on surface-level features and overlook the deeper intricacies that can make or break a project. A common misconception is that the most popular or feature-rich software automatically yields the best results. However, understanding the nuances of workflow optimization, plugin dependencies, and file management can significantly elevate your output. For instance, many believe that investing in high-end software guarantees flawless post-production, but neglecting hardware integration or proper color calibration often leads to subpar results. As an expert in this field, I emphasize mastering the subtle controls—like masking techniques in video editing or spectral editing in audio—that often remain hidden from beginners.
How can advanced knowledge of software architecture improve your editing precision?
Recent studies, including a 2024 report from Digital Creators Journal, highlight that creators who understand the underlying architecture of their tools achieve 30% faster workflows and cleaner outputs. One critical mistake I see repeatedly is editing without considering the codec and format compatibility—these can cause export issues or quality loss unseen to the naked eye. For example, choosing the wrong color space in your workflow might result in dull images once published, an issue that could have been prevented with a deeper understanding of color management systems. To avoid falling into common traps, I recommend regularly updating your knowledge through expert guides, like this comprehensive mobile editing workflow guide. Moreover, the habit of exploring lesser-known features—such as batch processing presets or audio ducking options—can significantly streamline your post-production process. Have you ever fallen into this trap? Let me know in the comments.
Keep Your Tools Sharp for Consistent Results
Staying on top of your editing game requires more than just knowing how to use your software—it’s about maintaining your equipment, staying updated with the latest plugins, and refining your workflow. I personally rely on a well-organized hardware setup, including a calibrated monitor and a fast SSD, to ensure my edits are accurate and efficient. Regularly updating your editing software and plugins—such as the latest versions of Adobe Premiere or DaVinci Resolve—can introduce performance improvements and new features that enhance your workflow. Remember, software updates often include crucial bug fixes and security patches, which prevent slowdown and crashes over time.
How do I keep my editing setup running smoothly?
Routine maintenance is key. Regularly clean your hardware, check for software updates, and manage your cache files to prevent bloating that slows down your system. For instance, clearing your Media Cache in Adobe Premiere periodically can prevent lag during complex edits. Additionally, investing in hardware upgrades like increased RAM or a dedicated GPU can significantly boost processing speeds, especially when working with 4K or higher resolutions.
Embrace Automation and Workflow Optimization
Automation tools, such as batch processing and preset scripts, save time and reduce repetitive tasks. I recommend exploring mobile editor apps that support seamless export presets for fast turnaround, especially when handling multiple projects. Integrating these tools into your workflow ensures consistency and allows more time for creative decisions. Mastering local and global color grading presets, for example, can streamline-looking edits across projects with minimal effort.
What hardware and software habits ensure longevity?
Practicing good backups and data management is vital. Use RAID configurations and cloud storage solutions like Google Drive or Dropbox to safeguard your work. Additionally, keeping your OS and drivers current prevents compatibility issues that could hinder performance. For instance, according to a 2024 report from Digital Creators Journal, creators who conducted quarterly hardware audits and system health checks reduced crashes by over 25%, leading to more reliable productivity.
Plan for Growth and Scalability
As your projects grow, so will your tools’ demands. Consider investing in scalable hardware, such as a NAS for storage or a multi-GPU setup, to handle larger files and more complex renders. Cloud-based rendering services are also a game-changer for shortening rendering times and managing high-resolution projects effortlessly. Remember, scalable systems not only improve current workflow but future-proof your setup against upcoming technology advancements.
In the fast-evolving landscape of post-production, staying proactive with maintenance and workflow refinement is essential. I encourage you to try setting up automated batch exports with your current software—it’s a simple tweak that can massively boost your efficiency. Keeping your tools in top shape might seem tedious at first, but it ensures your creative energy is focused solely on producing amazing content rather than troubleshooting technical issues. Keep your setup optimized, stay curious, and you’ll continue to craft stunning visuals with ease.

The Hardest Lesson I Learned About AI Lighting Fixes
One truth I’ve come to embrace is that relying solely on automated AI enhancements can lead to overlooked nuances, especially with lighting. Early in my journey, I thought presets were enough—turns out, they often need a guiding hand. The lightbulb moment came when I realized manual adjustments are irreplaceable for natural-looking results, and understanding how to tweak highlights and shadows manually was the key to transforming my workflow.
Tools that Became My Secret Weapon
Over time, I discovered several photo editing tools that revolutionized my editing process. Programs like Adobe Photoshop, Luminar, and Affinity Photo have robust local adjustment capabilities, making it easier to correct AI lighting errors with precision. I especially trust these tools because they offer non-destructive editing, which means I can experiment freely without risking my original image. Incorporating AI-specific correction plugins further enhances the effectiveness of these programs, especially when used alongside [AI lighting error correction tools](https://editingsoftware.creatorsetupguide.com/fix-ai-lighting-errors-4-photo-editing-tools-pros-use-in-2026).
What Making Lighting Look Natural Taught Me About Creativity
Fixing lighting issues isn’t just about technical correction; it’s a creative exercise. Striving for natural illumination pushes me to understand light behavior more deeply—how it interacts with textures, how shadows fall, and how highlights shimmer. This deeper comprehension elevates not just my corrections but my overall artistry. It reminds me that in post-production, technical skills and creative instincts are inseparable—each enriching the other, leading to portraits that truly resonate.
Are You Ready to Take Control of Your AI Editing Results?
If you’ve been relying solely on automated solutions and feeling frustrated with inconsistent lighting, I encourage you to experiment with manual adjustments and explore the powerful tools at your disposal. Mastering these techniques can save hours and produce images that stand out. Remember, each correction brings you closer to the perfect portrait—so keep experimenting, learning, and refining your skills. Your journey to flawless AI-edited portraits begins now.


Leave a Reply