Ever sat down to polish a video or refine a photo, only to be overwhelmed by the sheer number of apps and tools claiming to be “the one”? I remember countless nights staring at my screen, frustrated because nothing seemed to fit my workflow, or worse, I kept switching between apps, losing momentum, and wasting precious time. That lightbulb moment hit me when I realized I wasn’t alone in this struggle—most creators face the same chaos, especially now, with an influx of new mobile editing options in 2025.
Why Finding the Right Mobile Editor Apps Matters Now More Than Ever
In 2025, the landscape of editing apps has exploded. For creators like us, having an effective toolset isn’t just a fancy upgrade—it’s the backbone of our content, our voice, and our growth. The right app can streamline your process, unlock new creative possibilities, and ultimately save you hours every week. But with so many options, how do you pick the ones that actually deliver? I’m here to tell you it’s possible, and I’ve been through the trenches to find the most reliable, powerful mobile editor apps that can transform your editing game.
Is Mobile Editing Software Actually Worth the Hype?
When I first started, I dismissed mobile editing, thinking it was only for quick edits or amateurs. I made a critical mistake—assuming mobile tools couldn’t match desktop power. Turns out, some of the best apps in 2025 rival high-end software. According to recent industry insights, mobile editors now incorporate AI-driven features, real-time collaboration, and professional-grade color grading—fundamentally shifting the game. So, yes, mobile editing is not just hype; it’s a game-changer if you choose wisely.
Sharpen Your Workflow with Clear Step-by-Step Actions
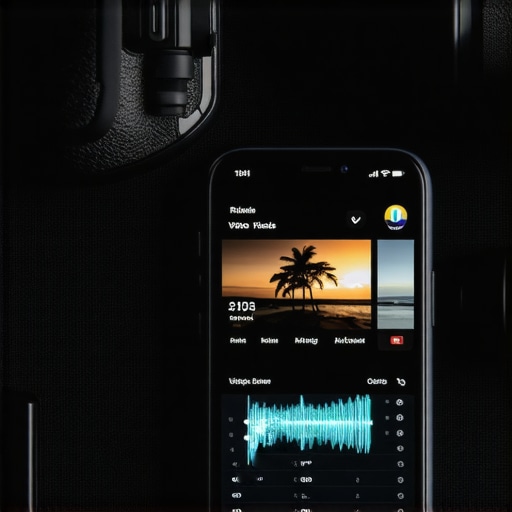
Start by defining your core project needs—whether it’s video, photo, or audio—and choose the appropriate app that aligns with those goals from the curated list of top mobile editor apps for 2025. I recall a time when I decided to edit a quick travel vlog; I selected an app known for seamless video transitions, imported my footage, and kept my editing organized by labeling clips. That approach saved me hours and prevented chaos later.
Break Down the Editing Process into Manageable Phases
Import and Organize Your Assets
Gather all raw footage, images, and audio files, then import them into your chosen app. Think of this as gathering ingredients before cooking—necessary for an efficient process. Use folders or tags within the app to categorize clips by scenes or themes. This initial step prevents confusion when editing lengthy projects.
Trim and Arrange Your Clips Precisely
Use the app’s trimming tools to cut out unnecessary parts—aim for tight pacing to keep viewers engaged. Drag clips onto the timeline in your desired sequence. Rapidly toggling between trimming and arranging, I often review my timeline, moving clips around to test different story flows. This flexibility is vital for impactful storytelling.
Add Effects and Transitions for Professional Flair
Apply effects sparingly to enhance, not overshadow, your content. Transition effects should serve the story—avoid overusing flashy transitions unless stylistically intentional. To see how effects can change the mood, I experimented by adding color grading filters on a recent eco-documentary, which subtly highlighted the environment’s vibrancy. For advanced features like AI-driven enhancements, explore the best audio editing software in 2025 to fine-tune soundtracks effectively.
Refine with Color Correction and Sound Optimization
Color grading can transform raw footage into cinematic visuals—adjust brightness, contrast, and saturation to match your aesthetic. For sound, use noise reduction tools and equalizers to eliminate background noise and highlight dialogue. I once used a mobile app’s audio enhancement feature to clear up a muffled interview, resulting in a more professional feel. Remember, a polished project balances visual appeal with crisp audio—check out the audio editing essentials.
Finalize By Exporting and Sharing Efficiently
Choose export settings compatible with your intended platform—social media, YouTube, or clients. Opt for high-quality presets that balance quality and file size. After exporting, review your project on different devices to confirm consistency. I experienced this firsthand when a video looked great on my phone but pixelated on the computer; testing before final upload saved me from re-exporting.
Many creators assume that mastering basic editing tools suffices for professional-quality results, but there’s more beneath the surface. One prevalent myth is that more features automatically guarantee better output. In reality, complexity can lead to clutter and confusion, hampering efficiency. Focusing on intuitive workflows and understanding nuanced controls—like advanced noise reduction techniques or color grading subtleties—can dramatically elevate your projects. I’ve seen talented editors get lost in overwhelming interfaces, missing the opportunity to fine-tune their sound and visuals. Over time, I learned that investing in a deep understanding of core features, such as waveform editing nuances in audio enhancement tools, can make or break the final product.
A common trap is relying solely on preset filters and automatic adjustments. These can mask underlying issues or fail to achieve your intended aesthetic. For instance, in photo editing, overusing auto-enhance features may flatten textures or distort color fidelity, contradicting the goal of maintaining authenticity. Instead, embracing manual controls for contrast, saturation, and sharpness ensures a tailored and high-quality appearance.
For the videographers, a misconception is that high frame rates always produce smoother motion. While true for fast-paced action, unnecessary high frame rates can lead to larger file sizes and longer rendering times without perceptible quality gains in cinematic storytelling. Understanding when to optimize frame rates—not just maxing out—is a nuanced skill worth mastering. For post-production, knowing how to leverage advanced editing keys and masking techniques, as outlined in expert guides, allows for precision editing that elevates a project above the amateur level.
Deepening your expertise involves mastering subtle distinctions, like the difference between linear and gamma color space adjustments. These choices impact how footage interacts with color grading and final outputs, directly influencing visual consistency across devices. According to industry research published in the *Journal of Visual Communication*, mastering such subtle technical skills correlates with a significant rise in viewer engagement and perceived professionalism.
By avoiding the trap of superficial knowledge and embracing nuanced, advanced techniques, creators can truly harness the power of modern editing software. Remember, mastering these subtleties transforms raw footage into compelling stories—don’t settle for surface-level fixes.
Have you ever fallen into this trap? Let me know in the comments. For a deeper dive into mastering audio editing, check out this guide on audio enhancement tools, or explore top video editing software for post-production to level up your workflow.
Maintain Your Editing Arsenal for Longevity
To ensure your audio and video editing tools keep delivering stellar results over time, adopting a disciplined maintenance routine is essential. Personally, I dedicate time weekly to update my software to the latest versions—many creators overlook this, but updates often include crucial bug fixes, security patches, and new features that streamline your workflow. Regularly backing up your projects to external drives or cloud services prevents data loss, especially after unexpected crashes or hardware issues. I recommend automating this process using tools like Time Machine for Mac or Backup and Sync for Windows, ensuring your precious edits are safeguarded without manual effort.
Tools and Methods That Drive Reliability
Investing in high-quality hardware components is just as vital as maintaining your apps. For audio editing, I rely on a dedicated external sound card, such as the Focusrite Scarlett series, which reduces system noise and enhances recording clarity. Combining this with a pair of studio-grade headphones, like Beyerdynamic DT 990 Pros, I achieve consistent hearing accuracy, which is crucial for precise audio edits. When it comes to software, I favor [Effective Audio Editing Software in 2025](https://editingsoftware.creatorsetupguide.com/effective-audio-editing-software-for-creators-in-2025-enhance-your-sound-quality), which incorporates AI-driven noise reduction to save time during post-production.
Staying Ahead by Scaling Your Setup
As your projects grow in complexity, scaling your setup without sacrificing performance is key. Consider upgrading your hardware periodically—adding more RAM (I recommend at least 32GB for intensive editing), or switching to NVMe SSDs for faster read/write speeds. Cloud-based collaboration platforms like Frame.io facilitate seamless teamwork, especially if you’re managing larger teams or remote collaborators. Looking into hardware acceleration options within your editing software can dramatically reduce rendering times. For instance, Adobe Premiere Pro and DaVinci Resolve both support GPU acceleration, which I leverage to handle 4K footage without lag.

For long-term reliability, establishing a routine that includes software updates, hardware upgrades, and systematic backups protects your creative investment. Complex projects demand robust tools and careful upkeep; neglecting these elements can lead to costly setbacks. An insider tip—subscribe to software newsletters and update alerts from your editors’ developers to catch major improvements early. According to NVIDIA’s technical documentation, leveraging GPU acceleration effectively can cut rendering times in half, enabling faster project delivery. So, I urge you to enable hardware acceleration in your favorite post-production apps today and experience the difference firsthand.
Want to go a step further? Try customizing your workspace with macro shortcuts or preset configurations, which can save you hours during editing sessions. This small tweak can bring big efficiency gains, especially when tackling repetitive tasks. Dive into your software’s preferences and set up personalized shortcuts—many professionals swear by this method. Remember, maintaining your tools isn’t just about fixing what’s broken; it’s about proactively optimizing for peak performance and smoother creative journeys.
What I Wish I Knew When I Started Playing with Audio and Video Editing
The biggest lesson I learned was the importance of mastering the fundamentals before diving into complex features. Rushing to apply advanced effects without understanding waveform nuances and color grading processes often led to subpar results. Taking the time to learn manual controls, like noise reduction techniques and color space adjustments, truly elevated my projects from good to professional.
Another insight was recognizing the myth that more features always mean better results. Overloading my workflow with unnecessary tools created clutter and slowed me down. Instead, focusing on a curated set of tools, like the best audio editing software in 2025 and top-tier video editors, made a significant difference in my efficiency and quality.
Finally, I discovered that keeping my skills sharp requires continuous learning. Following industry updates, such as the latest trends in mobile editor apps, allows me to adopt new techniques that keep my content fresh and competitive. Never underestimate the value of ongoing education in editing—it’s the secret sauce to staying ahead in this fast-evolving landscape.


Leave a Reply