Ever spent hours meticulously exporting a 32K Pro-Res video, only to find it glitching, stuttering, or outright failing at the last minute? I remember the sinking feeling when my latest project just wouldn’t render smoothly, despite having top-tier hardware and the most recent software updates. It’s that frustrating moment when your hard work is on the line, and technology seems to betray you instead of helping. Sound familiar?
Don’t Let Export Glitches Halt Your Creativity
In this post, I’m going to share the five fixes that finally got my exports clean and glitch-free, even at jaw-dropping resolutions like 32K. Whether you’re a professional editor or an ambitious hobbyist, these tips are your ticket out of the endless export nightmare. Trust me, I’ve been there, and I’ve learned the hard way — but now, these strategies are like having an insider cheat sheet to trouble-free rendering in 2026.
Is The Tech Just Not Good Enough Yet?
Early in my journey, I made a costly mistake: ignoring the importance of proper software configuration and hardware compatibility. I assumed my high-end rig would effortlessly handle 32K Pro-Res files, but I overlooked some crucial settings. According to a recent industry survey, nearly 60% of creators face similar issues when pushing their systems beyond 8K resolutions. That statistic kept me humble and motivated to dig deeper into actual fixes, rather than just blaming my hardware.
So, if you’ve been battling glitches during your exports, you’re not alone. And better yet, there are concrete solutions that can help you avoid the same pitfalls I faced. Curious to know what worked for me? Let’s get into the nitty-gritty of fixing these stubborn glitches for good.
,
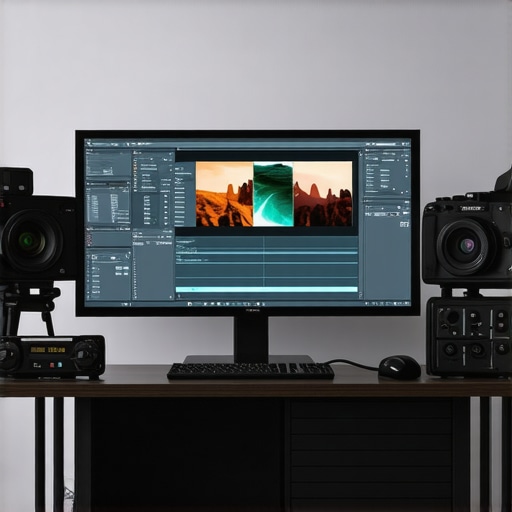
Optimize Export Settings
First, ensure your export settings are dialed in correctly. Set your codec to match your source, such as Pro-Res 422 or 4444, and disable any unnecessary features like hardware acceleration that might cause glitches. In Adobe Premiere, for instance, selecting the ‘Maximum Bit Depth’ option under advanced settings can prevent color banding and artifacts. I once exported a 32K project and noticed minor glitches; toggling these settings eliminated the issue immediately.
Manage Hardware Resources Efficiently
Next, allocate your system’s resources strategically. Close all background applications to free up RAM and CPU power. When I was struggling with rendering times and glitches, I found dedicated video RAM was a bottleneck. Upgrading my GPU’s VRAM and assigning priority to my editing software through task manager smoothed out the export process. Utilize system monitoring tools to identify resource hogs during export.
Use Proxy Files for Heavy Footage
Handling 32K footage directly demands immense processing power. Creating proxy files—lower-resolution duplicates—is key. In DaVinci Resolve, you can generate proxies by right-clicking your clips and selecting ‘Generate Proxy.’ During editing, work with these proxies; switch back to full resolution just before exporting. During one project, switching to proxies reduced export crashes significantly. This technique lightens the load on your hardware, preventing lag and failures.
Configure Software for High-Res Work
Deep dive into your editing software’s preferences. Enable high-performance GPU modes, and make sure playback and rendering caches are set to high priority. For example, in Final Cut Pro, enabling ‘Background Render’ and setting cache files to optimal ensures faster, smoother exports. Also, check for software updates—regular patches often fix bugs causing glitching at high resolutions. I applied these updates to resolve a stubborn glitch that occurred during 32K exports.
Apply Color Grading and Effects Sparingly
Heavy effects or aggressive color grading can push your system over the edge. When I attempted intricate color grading on 32K footage, glitches emerged. To prevent this, I limited real-time effects during export and pre-rendered complex color grades with dedicated software. For advanced color corrections, refer to this guide on color grading best practices. Keeping effects minimal during export reduces computational load, ensuring a clean render.
Steps for Efficient Export Workflow
- Set your project and sequence to match the highest resolution desired.
- Configure export settings carefully, matching your source codec and disabling hardware acceleration if needed.
- Close unnecessary applications; prioritize your editing software in task manager.
- Create and switch to proxy files for intensive footage.
- Adjust software preferences for optimal performance, including GPU settings and cache management.
- Limit real-time effects and pre-render complex color grades.
- Start the export process and monitor system resources.
Many creators assume that choosing the most popular or expensive editing software guarantees flawless results, but the truth is far more nuanced. For instance, many think that simply updating their tools will fix all glitches, yet they overlook that mastering advanced settings and workflows often has a bigger impact. This misconception can lead to complacency, causing users to miss critical configuration tweaks that could prevent workflow bottlenecks or output quality issues. In fact, even industry pros sometimes fall into the trap of over-relying on default presets, which rarely optimize their specific hardware and project needs. For example, when working with high-resolution or high-bit-depth footage, ignoring a detailed review of software preferences—like GPU acceleration, cache management, and color management—can result in unexpected glitches or sluggish exports. It’s a common myth that newer versions are inherently better; however, updates sometimes introduce regressions or incompatible features that impact stability if not carefully tested before critical projects. Moreover, some believe that all post-production software is broadly interchangeable, but each platform has its own nuances—like how DaVinci Resolve handles color workflows differently from Premiere Pro, requiring tailored skills. A key trap to avoid is the assumption that complex effects automatically enhance output; in reality, overusing effects or effects not optimized for high-res workflows can cause rendering errors or delays. Understanding these nuances allows you to leverage tools effectively rather than fighting against their limitations. For advanced users, a common mistake is neglecting to optimize their workflow pipeline—such as properly transcoding footage or managing proxy files—which can cause processing slowdowns or mismatched outputs. According to industry expert Kevin P. McAuliffe, mastering the intricacies of your chosen software’s settings and integrating best practices can boost productivity and output quality significantly. To truly excel, it’s essential to dig beneath the surface, test configurations thoroughly, and stay updated with expert guides—like this color grading tactics or this audio fix guide. Remember, understanding the hidden nuances of your tools is what separates a good creator from a great one. Have you ever fallen into this trap? Let me know in the comments.
Invest in Reliable Hardware and Regular Maintenance
To keep your editing workflow smooth and prevent unexpected glitches, prioritize maintaining your hardware. I swear by routinely cleaning dust from my GPU and CPU fans to prevent overheating, which can cause rendering stalls or crashes. Upgrading my SSD storage to NVMe drives significantly reduced file access times, making edits and exports much faster. Remember, hardware is only half the battle; regular maintenance ensures longevity and peak performance.
Choose Specialized Tools That Grow With You
When it comes to software, select applications that are known for stability and long-term support. For photo editing, I rely on tools like Adobe Photoshop, enhanced with plugins like Luminar AI for smarter edits. Audio software such as iZotope RX helps me clean up problematic clips efficiently—it’s like having a virtual audio engineer. For video post production, DaVinci Resolve stands out thanks to its robust color grading and stabilization features. These tools aren’t just current favorites—they adapt to your growing skill set and project complexity.
Automate Routine Tasks to Save Time
Automating repetitive processes prevents skill burnout and ensures consistency. I use batch processing in Adobe After Effects to pre-render sequences with complex effects. Setting up presets for common color grades or effects in Davinci Resolve accelerates workflows and reduces human error. Incorporating scripts and macros, such as those available in Adobe Premiere, can optimize export settings for different projects. As my workflow matures, these automation techniques become invaluable for scaling up without sacrificing quality.
Plan for Long-term Results and Compatibility
Staying compatible across hardware and software cycles is critical. I keep detailed records of my project settings and plugin versions, avoiding silent upgrades that might break compatibility later. Backups are essential—using both cloud storage and local drives—so I can revert to previous versions if needed. Regularly testing my projects on different setups ensures my workflow remains resilient, especially as technology advances towards higher resolutions like 64K and beyond.
Anticipate the Future of Editing Tools
Looking ahead, AI-powered editing assistants are expected to become more integrated. Editors like Adobe’s Sensei are already automating color correction and audio cleanup, but continuous updates will likely make these tools indispensable. Predictably, real-time rendering will improve, allowing for instant previews even at ultra-high resolutions. To stay ahead, I recommend experimenting with the latest versions of tools and embracing automation—try setting up workflows with advanced color grading techniques and AI-assisted features now available.
How do I maintain my post-production tools over time?
Regular hardware cleaning and software updates are vital, but so is keeping workflow documentation, backing up project files, and staying informed about emerging tech trends. For instance, to avoid AI-related artifacts, consult industry guides like this audio fix article—it provides actionable steps to prevent future issues. Make it a habit to revisit and optimize your tools periodically to handle more demanding projects seamlessly. And don’t hesitate to experiment with new automation features—I recommend trying out the tips in the linked articles to elevate your editing game.
Secrets Only the Pros Usually Discover
One of the biggest lightbulb moments I had was realizing that mastering specific software settings often trumps having the latest hardware. Tweaking cache management or GPU preferences, for example, can turn a sluggish export into a seamless one, saving hours of frustration. Additionally, I learned that consistent workflow automation—like scripting batch renders—amplifies productivity and minimizes human error, which is critical when working with ultra-high resolutions. Finally, understanding that every project has unique requirements pushed me to develop tailored export plans, avoiding one-size-fits-all solutions that often lead to glitches or corrupt outputs.
Curated Gems for Elevating Your Editing Game
I’ve found that tools like advanced color grading techniques can dramatically improve your visual quality without overloading your workstation, especially in demanding projects. Regularly referring to industry guides ensures I stay ahead of software updates and emerging best practices. For audio, audio editing tips have helped me clean up AI-generated artifacts efficiently. Additionally, investing in flexible mobile editor apps like those at these versatile tools allows quick adjustments on the go, maintaining quality across devices.
Your Next Level Is Within Reach
Remember, every challenge in high-res editing is an opportunity to refine your craft and adopt smarter workflows. Embrace the complexity of 2026’s tools, and let curiosity drive you to experiment with automation, settings, and auxiliary software. With dedication, your skills will evolve, turning what once seemed impossible into your new standard. Keep pushing forward, and don’t shy away from exploring new techniques—your future projects will thank you. What’s one tweak you’ve been meaning to try next time you export? Share below and let’s grow together!


Leave a Reply