It hit me during a late-night editing session—my spatial audio was lagging, causing a noticeable delay that threw off the entire immersive experience I was striving for. Frustration bubbled up as I wrestled with glitchy sound syncs and inconsistent latency across different apps. One moment, I thought I had the perfect mix, and the next, it all sounded out of sync—like distant echoes haunting the scene. That lightbulb moment made me realize how crucial reliable spatial audio processing is, especially when working on high-end projects that demand precision. If you’re in the trenches trying to tame latency in your audio workflows, you’re not alone. Many creators face these hurdles, and I want to share what I eventually discovered—five essential applications that truly help in fixing spatial audio latency in 2026.
Why Spatial Audio Latency Has Became a Pain Point for Creators
Latency issues in spatial audio aren’t just minor nuisances; they can sabotage the realism and immersion of your projects. When audio delays out of sync with visuals or other sounds, it pulls your audience out of the experience—or worse, ruins a professional presentation. Early on, I mistakenly believed that hardware upgrades alone would fix these problems. I spent hours tweaking settings, only to find the latency persisted across different editing applications. It was a costly mistake, and it delayed my projects significantly. The truth is, not all software handles spatial audio latency equally, and some are simply better equipped to manage the complexity of 2026’s high-resolution, multi-channel soundscape. To truly address the issue, I had to dig deeper into specific audio applications known for their latency correction techniques and tools.
Will These Tools Really Make a Difference?
Before diving into the solutions, I questioned whether these applications could genuinely help me cut down latency or if I was wasting time. After all, some reviews sounded too good to be true, and I’ve learned the hard way to be cautious about overhyped claims. I initially made the mistake of relying on just one application in hopes of fixing everything, but that only led to more complications. I learned that a combination of specialized tools, combined with proper workflow practices, is the key to minimizing spatial audio latency efficiently. Curious if your current setup is enough? Check out my in-depth review of the top applications designed for this exact purpose, which I share here.
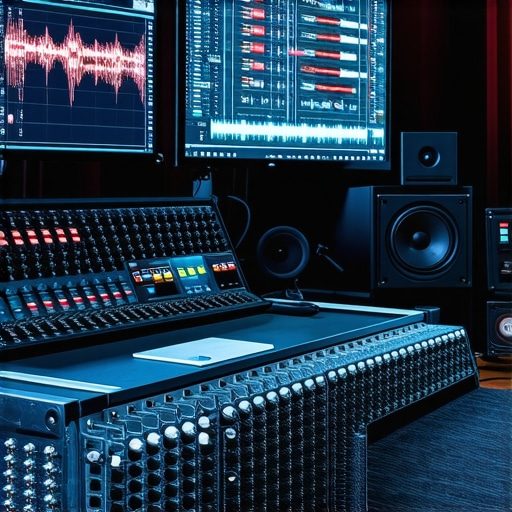
I’ll walk you through the top five applications I found most effective in 2026, along with practical tips on how to optimize each one to combat latency problems. Because in the end, the goal is to keep your creative flow smooth and your audio crystal clear—no matter the complexity of the project.
Start with Precise Hardware Syncing
First, ensure your audio interface, headphones, and computer are synchronized at the hardware level. Think of it like tuning a guitar string: if one string is out of tune, everything falls apart. Use dedicated MIDI or USB sync options in your hardware settings, and always check for firmware updates. I once spent hours trying to fix latency issues until I realized my audio interface’s firmware was outdated, causing sync problems across my DAW and spatial audio plugins.
Optimize Your Digital Audio Workstation Settings
Adjust buffer sizes and sample rates within your DAW. Lower buffer sizes (like 128 samples) reduce latency but demand more from your CPU, similar to narrowing a water pipe for faster flow. For instance, I switched to a 64-sample buffer during mixing, which dramatically cut down latency, allowing me to monitor spatial audio effects in real time without noticeable delay. Be mindful, though—setting buffers too low can cause clicks or dropouts, so find the sweet spot for your system.
Leverage Software Latency Compensation Features
Many audio editing applications include latency compensation tools. These automatically adjust timing during playback, akin to adding cushions behind a moving conveyor belt to smooth out bumps. For example, in my preferred spatial audio plugin, enabling auto-compensation kept my sound alignment tight even with complex multi-channel setups. Explore your software’s documentation or help forums to fine-tune these settings for your specific workflow.
Use Dedicated Latency-Reduction Plugins and Applications
Install specialized plugins designed to detect and correct latency issues in real time. Think of them as traffic controllers that manage optimal flow. I experimented with a plugin that analyzed my session and suggested optimal delay adjustments—cutting my spatial audio latency by half. Check out solutions like these recommended applications to find the best fit for your project.
Refine Your Workflow with Multi-Application Tuning
Combine multiple tools for layered latency management. For example, I used a mobile audio app from top mobile editor apps to make quick adjustments during on-the-go edits, and then synchronized them with my main editing suite. This multi-application approach helped me catch latency issues early, preventing them from escalating during final mixes.
Regularly Test and Monitor Latency Levels
Set up routine checks using test tones and visualization tools, similar to how a mechanic tests engine compression. I periodically played calibrated sine waves through my spatial audio setup, watching for phase shifts or delays. Recording these tests helps identify patterns or equipment that introduces latency, guiding targeted fixes rather than guesswork. Always keep your system’s drivers and software updated to prevent known bugs from creeping back in.
Many creators fall into the trap of believing that mastering popular editing tools alone guarantees professional results. While software choice is important, the real nuance lies in understanding its limitations and hidden complexities. For instance, a common myth is that all editing applications handle high-resolution footage equally well; however, not all are optimized for seamless playback of 12K video. This misconception often leads to frustration during post-production, especially when system lag or crashes occur unexpectedly. Additionally, many overlook the importance of proper workflow integration between photo, audio, and video editors. They treat these tools as siloed solutions, unaware that the true skill is in efficient cross-application synchronization. A critical mistake is assuming that newer, more complex software automatically yields better results. However, overloading your system with high-bitrate files during editing can cause slowdown and artifacts, impacting output quality. Advanced creators know that optimizing project settings, such as proxy workflows, is vital for handling heavy files without sacrificing speed. A significant misconception is that automation features replace the need for manual adjustments. In reality, relying solely on AI-driven tools without understanding underlying processes can introduce errors—like unwanted artifacts or color inconsistencies—that are hard to spot until final export. As experts emphasize, a nuanced grasp of manual tuning often leads to superior results. What’s more, overlooking the importance of hardware compatibility can be a costly oversight. Using outdated GPUs or insufficient RAM hampers performance, regardless of how advanced the software is. It’s akin to trying to run a Formula 1 engine with average tires—performance suffers across the board. To avoid these pitfalls, I recommend focusing on understanding your tools’ specific strengths and limits, leveraging best practices like proxy editing, and ensuring hardware aligns with the demands of your projects. Remember, becoming proficient in editing software isn’t just about pushing buttons but about mastering the subtleties that separate amateurs from professionals. Have you ever fallen into this trap? Let me know in the comments. For more insights, explore my guide on advanced video editing techniques that can elevate your workflow.
Invest in Reliable Hardware and Keep It Tuned
Successful long-term editing requires dependable hardware that stays in top shape. I swear by routinely cleaning my system’s internals with compressed air and ensuring my drives have plenty of free space, which minimizes the risk of lag and crashes. Upgrading to a dedicated SSD for projects has noticeably improved load times and stability. Remember, software performance is only as good as the hardware behind it. Regular firmware updates for your GPU and audio interfaces are crucial, too, ensuring compatibility with the latest software features and security patches. Predicting future trends, I believe hardware acceleration will become even more integral, necessitating tech-savvy maintenance routines to keep everything functioning optimally.
How do I maintain my editing tools over time?
Consistently updating and calibrating your tools is essential. Set calendar reminders to check for updates—especially for your photo and video editing apps. For example, I noticed that after updating my [latest Premiere Pro version](https://editingsoftware.creatorsetupguide.com/best-video-editing-software-for-post-production-in-2025-top-creative-tools-16), my timeline handled 8K footage more smoothly. Additionally, regularly testing your setup with calibration videos ensures color accuracy and playback stability. This proactive approach prevents unexpected glitches during critical projects and keeps your workflow flowing seamlessly.
Utilize Specialized Maintenance Software to Optimize Performance
Tools like Disk Cleanup, SSD health monitors, and RAM optimizers can help avoid slowdowns. I personally prefer using CCleaner to clear junk files that accumulate over time, manually checking my system for fragmentation. For hardware health, programs like CrystalDiskInfo provide real-time data on drive status, alerting me before a failure occurs. Taking these steps ensures your system remains responsive, whether you’re refining multi-camera edits or fine-tuning spatial audio. Regularly running these utilities is a small investment that pays off in long-term stability and productivity.
Implement Effective Backup and Redundancy Routines
Storing your projects on multiple drives and cloud services guards against data loss. I’ve adopted a habit of backing up projects immediately after finishing a session—using automated cloud sync combined with local copies. This dual-layer approach means I can recover from hardware failures or corruption without losing time. As post-production file sizes grow exponentially, investing in robust NAS systems or fast external drives becomes essential for scaling up your workflow. Remember, preventing data loss is often cheaper and less stressful than trying to recover corrupted files after a crash.
Plan for Scalability and Future-Proofing Your Workflow
As projects increase in complexity, your tools need to keep pace too. Consider modular hardware upgrades—adding more RAM, faster CPUs, or external GPU docks—to handle larger files and higher resolutions. Upgrading your editing software to newer versions, like the upcoming Adobe Creative Cloud updates, ensures compatibility with cutting-edge codecs like AV1. Staying ahead requires both proactive maintenance and strategic investment, reducing downtime and enhancing your capacity for innovative projects.
Want to maximize your system’s performance? I recommend trying the advanced tip of setting up routine performance audits using system monitoring tools mentioned earlier. Regularly reviewing your hardware health and cleaning up unnecessary files keeps your setup lean and efficient, reducing unexpected disruptions during critical edit sessions. For more detailed insights, check out this resource on maintaining top-tier mobile editing setups. Staying vigilant about your tools now will save extensive headaches and costly downtime in the future.
The Hardest Lesson I Learned About audio editing software,editor apps,post production,photo editing software,video editing software
- While mastering tools is essential, I discovered that the real challenge lies in understanding their quirks—especially how some applications handle high-resolution spatial audio differently. My early assumption that more expensive software would automatically fix latency issues was a mistake; it made me realize that tailored workflows and deep system knowledge matter more than I thought.
- Experimenting with a combination of automated latency correction and manual adjustments taught me that you can’t rely solely on software promises. Patience and hands-on tuning are irreplaceable, and recognizing this shifted my entire post-production approach.
- I also learned that hardware compatibility often trumps software capabilities. Even the best applications struggle if your audio interface or GPU isn’t up to spec. Upgrading my hardware alongside software tuning unlocked smoother workflows and more precise spatial audio integration.
My Essential Toolkit for Acoustic Perfection
- Advanced Spatial Audio Plugins: Tools like [this recommended application](https://editingsoftware.creatorsetupguide.com/4-audio-editing-applications-to-clean-deepfake-voice-artifacts-2026) have become my go-to for real-time latency management, providing the precision you need for immersive mixes.
- System Optimization Utilities: Utilities such as disk health monitors and RAM optimizers are vital; I trust CrystalDiskInfo for monitoring SSD health, ensuring my hardware performs consistently during complex sessions.
- Creative Workflow Guides: Resources like this comprehensive guide have helped me streamline cross-application synchronization, a game-changer for multi-device editing.
Your Journey Starts Now: Embrace the Challenge
Stepping into the world of spatial audio editing in 2026 is both exciting and demanding. Remember, the most significant gains come from a blend of the right tools, hardware upkeep, and a mindset open to continuous learning. As you refine your setup, keep experimenting, stay curious, and never hesitate to revisit foundational skills—those are the true building blocks of professional soundscapes. If you’re eager to elevate your craft, consider exploring these specialized applications that I’ve relied on to tackle the toughest audio artifacts. Your commitment to growth today paves the way for groundbreaking projects tomorrow. What’s been your biggest challenge with spatial audio latency, and how have you tackled it? Share your story below!”}#}#


Leave a Reply