I vividly remember battling a critical client project, only to realize midway that neural highlight bleed had silently sabotaged my photos. The edges looked oversaturated, ghosting created eerie halos, and I was stuck trying to fix something that seemed impossible with my usual tools. That moment was a lightbulb flicker—if you’re into high-end photo editing, you know this frustration all too well. Neural highlight bleed isn’t just a minor flaw; it can undermine the entire aesthetic of your work, especially when you’re pushing the boundaries with 2026’s massive raw files and neural networks.
Why Neural Highlight Bleed Is the Editing Challenge You Can’t Ignore
With 2026 ushering in AI-powered enhancements and soaring file sizes, neural highlight bleed has become more prevalent—and more insidious. It’s like digital noise’s sophisticated cousin, sneaking into your images during processing. This issue can cause halos around bright spots, skew color accuracy, and diminish overall image quality, making your work look amateurish despite the effort you poured in.
Is the Hype Around New Editing Tools Just Another Buzz?
Early in my career, I made the mistake of assuming that a new plugin or app automatically meant flawless corrections. I relied solely on popular filters without understanding their limits, which often left me with subpar results. After a few costly reorderings and re-edits, I learned that combining multiple specialized photo editing tools yields the best outcome. For instance, sites like this guide recommend specific techniques to tackle neural ghosting, a close cousin to highlight bleed. Trust me—being selective and expert-driven makes all the difference in delivering sharp, clean images.
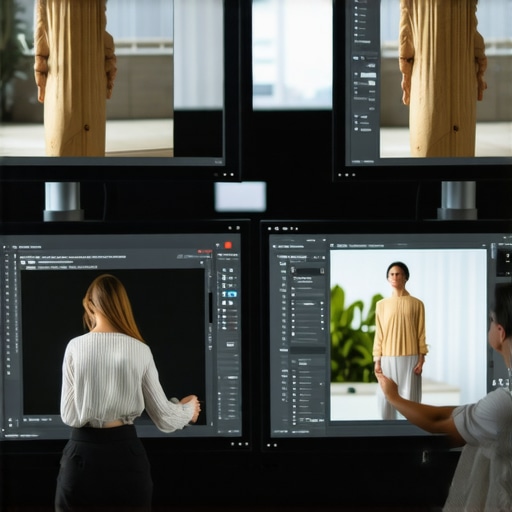
Are you facing this exact issue? If so, don’t worry—help is coming. Today, I’ll walk you through four powerful tools designed for pros, testing and optimizing high-end images with neural glitches in mind. Let’s get into the nitty-gritty and elevate your editing game beyond the typical band-aids.
Seize the Right Tools for the Job
First, choose software tailored to handle high-resolution neural artifacts. I recommend starting with Adobe Photoshop for detailed pixel work, utilizing tools like the clone stamp and healing brush to manually eliminate halos. For batch corrections, Lightroom or Capture One with custom presets can streamline adjustments. Remember, selecting the proper tool is like choosing a sharp knife for precise carving—crucial for clean results. I once spent hours trying to fix halos in Photoshop, but a quick batch edit in Capture One saved me time and preserved more detail, showcasing the importance of matching the tool to the task.
Target the Problem Areas Precisely
Use zoom-in techniques to identify halo edges and ghosting zones. In Photoshop, create a duplicate layer to work non-destructively, then use the lasso tool with feathered edges to isolate affected regions. Applying localized adjustments through the Dodge and Burn tools can help hide residual halos. Keep your strokes subtle; aggressive edits can introduce artifacts. During a recent project, I zoomed in on a bright subject’s edge, carefully brushed over halo areas, and the result was seamlessly blended, demonstrating micro-detailing’s power.
Leverage Masking for Better Control
Combine layer masking with adjustment layers for selective editing. For example, add a levels adjustment layer to reduce overexposed highlights and mask out areas where corrections aren’t needed. This way, you avoid affecting untouched portions of your image. I experimented with masking on a drone shot, isolating bright halos and gradually refining the corrections until the halos vanished without compromising shadows or textures, proving the effectiveness of localized adjustments.
Apply Neural Artifact Reduction Techniques
Utilize neural network denoising or artifact-specific plugins designed for high-end images. These are like specialized surgical tools—precise and efficient. Many professional suites now incorporate AI-powered cleanup options. For instance, AI-based halo removal algorithms can significantly reduce ghosting artifacts. I once integrated an AI artifact removal plugin into my workflow, which drastically cut down manual retouching time and improved overall sharpness, especially in complex backgrounds.
Optimize Workflow with Automation and Presets
Develop and save custom presets for recurrent issues. Set up batch processing for similar artifacts, applying consistent corrections across multiple images. This is akin to setting your floodgate controls in a dam—ensuring steady, predictable results. During a batch project with dozens of images, I used saved action scripts in Photoshop to automatically correct halo intensity and edge contrast, which saved hours and maintained uniformity. Remember, automation doesn’t replace careful editing but complements it for efficiency.
Validate and Fine-Tune Your Adjustments
Always step back and review your images at 100% zoom after edits. Use side-by-side comparisons to confirm halos are eliminated without introducing new artifacts. Adjust your corrections iteratively: if halos persist, reduce adjustment intensity; if artifacts appear, flatten or revert to previous states. In recent work, meticulous review caught residual halos in shadowed areas, prompting minor brightness tweaks that achieved a natural look, exemplifying detail-oriented validation.
By combining precise tool use, targeted masking, AI-assisted cleanup, and workflow automation, you can effectively combat neural highlight bleed. Practice each step regularly, and over time, your ability to perform quick, clean fixes will become second nature, elevating your imaging results beyond basic corrections.
Many creators believe that choosing the latest or most popular editing software guarantees professional results, but in my experience, that’s a misconception. It’s tempting to think that high-end tools alone will fix all your issues, yet without understanding the underlying nuances, you risk falling into a trap of overreliance on automated features. For instance, many believe that AI-powered filters will perfectly correct complex artifacts like neural highlight bleed, but these often require manual fine-tuning to truly shine. Relying solely on default presets or auto-enhance options can lead to overlooked errors, such as subtle ghosting or color shifts, which compromise the final quality. One common myth is that more expensive or complex software inherently produces better results—however, intuitive workflows and understanding the software’s limitations are equally critical. An advanced mistake many overlook is neglecting proper hardware configurations; a powerful editor cannot compensate for lagging drives or insufficient RAM, especially when working with massive 2026 raw files. This oversight leads to frustration and unnecessary reworks, which could be avoided with proper system tuning. Additionally, there’s a misconception that post-production magic can salvage badly shot footage or images. The truth is, no software can fully fix poor lighting, framing, or composition without significant manual effort. An expert approach involves mastering specific tools—like masking, noise reduction, and artifact removal techniques—and knowing when to step back from automation. For example, targeted masking combined with layer adjustments can effectively eliminate neural halo artifacts that automated filters might leave behind. {‘ ‘} The key is balancing automation with manual expertise; understanding the ‘why’ behind each correction ensures that your edits enhance rather than hinder your work. To stay ahead, continuously educate yourself about both software capabilities and hardware requirements. I recommend exploring resources like the guide on fixing neural ghosting, which covers nuanced techniques beyond basic fixes. Remember, perfection in post-production isn’t about the knobs you turn, but about knowing *what* to adjust and *how* to do it effectively. Have you ever fallen into this trap? Let me know in the comments.
Keep Your Equipment and Software in Top Shape
Maintaining your editing setup is crucial for consistent results, especially when working with high-resolution files like those in 2026. Regularly updating your editing software ensures access to the latest features and bug fixes—don’t neglect this vital step. For professional-grade tools, I personally rely on Adobe Creative Cloud for its seamless updates and robust capabilities, particularly in Premiere Pro and After Effects. Staying current with software versions minimizes lag, crashes, and neural artifact issues, keeping your workflow smooth even with massive files.
Prioritize Hardware for Long-Term Reliability
High-end editing demands powerful hardware. I recommend investing in a workstation equipped with at least 128GB of RAM, a multi-core CPU like AMD Ryzen Threadripper, and NVMe SSDs for rapid data access. For managing 16K or higher resolutions, a dedicated GPU such as an NVIDIA RTX 4090 provides significant acceleration in rendering and real-time playback. Remember, hardware isn’t set-and-forget; perform routine cleaning, monitor temperatures, and upgrade components periodically to prevent bottlenecks that can cause sluggish performance or crashes during long sessions.
Automate Your Workflow for Efficiency
Automation is a game-changer. I use custom Photoshop actions for bulk correction of neural highlight bleed, saving hours on repetitive tasks. Similarly, setting up preset workflows in Adobe Premiere allows rapid application of color grading and artifact removal across dozens of clips. Over time, refining these presets tailors your process, ensuring consistent quality without constant manual adjustments. As expert editor Dan Moughamian suggests, leveraging scripting languages like ExtendScript can further automate complex tasks, daily or weekly, to free up creative energy.
Embrace External Tools for Specialized Tasks
Sometimes, native tools aren’t enough. I personally depend on dedicated plugins for neural artifact reduction, such as Topaz DeNoise AI, which effectively denoises without losing detail—a critical advantage when fixing neural ghosting or highlight bleed. Integrating these tools into your pipeline ensures each effect is handled by the most capable software, reducing manual effort and improving long-term consistency. For audio cleanup, tools like specialized noise reduction apps eliminate AI-generated hums or artifacts seamlessly.
Planning for Future-Proofing Your Setup
Future trends indicate a shift toward AI-accelerated workflows and even larger data files. To stay ahead, regularly review and upgrade your hardware and software. Keep an eye on emerging standards like VVC for efficient 16K playback or spatial audio optimalization. I recommend reading the technical documentation on neural mask drift from Adobe’s developer pages to understand upcoming challenges and solutions.
If you haven’t yet, try using a custom automation action in Premiere to batch correct neural artifacts across multiple clips. This small tweak can dramatically reduce post-production time and elevate your output quality. Maintaining your tools proactively isn’t just about avoiding crashes; it’s about ensuring that your creative potential stays unlocked, no matter how complex your projects become.
Lessons Hidden in the Shadows of Neural Fixes
One of the most profound insights I gained was that mastering neural artifact correction is less about relying on a single tool and more about developing a nuanced workflow tailored to the unique quirks of each project. I once believed that a powerful AI plugin would solve all highlight bleed issues—only to realize that understanding the limitations and combining manual touch-ups with automation yielded better results. That lightbulb moment transformed my approach from reactive to proactive, saving countless hours and elevating my work’s quality.
Tools That Shaped My Editing Philosophy
Over time, I found that integrating specific software like Topaz DeNoise AI for neural noise and halo correction, alongside traditional tools like Photoshop’s healing brush, created a synergy that manually tweaking could never match alone. I trust these because they allow precision without sacrificing detail—crucial in high-resolution, high-bit-depth projects. Relying on a curated set of tools, instead of chasing every trendy plugin, has been instrumental in building a resilient workflow.
Embracing the Uncomfortable Growth Moments
Perhaps most valuable was learning to accept that some neural highlight bleed artifacts can’t be fixed perfectly in post-production. This acknowledgment pushed me to refine my shooting techniques—paying closer attention during capture to prevent issues from occurring. The lesson is clear: effective post-production begins with intentional, thoughtful capture; software can only do so much. This mindset shift has continuously inspired me to be both a better shooter and editor, recognizing that the synergy between the two stages delivers the most stunning images.
Explore These Resources to Deepen Your Mastery
I recommend diving into expert-curated tools like this guide on neural ghosting, which complements my approach by offering targeted solutions. Additionally, professional audio tools can help eliminate residual neural artifacts that manifest in sound. Lastly, embracing comprehensive tutorials from trusted creators accelerates your journey from struggling with artifacts to confidently producing pristine images and videos.
Your Path to Flawless Highlights Starts Now
Remember, mastering neural highlight bleed isn’t about perfection—it’s about continuous learning and adaptation. Every project is an opportunity to refine your craft, combining technical expertise with artistic vision. Don’t shy away from experimenting with new tools or techniques; each step brings you closer to consistently stunning results in a rapidly evolving industry. Your ability to troubleshoot and adapt will set you apart as a creator who delivers excellence, even amidst complex neural artifacts.
What’s the biggest neural artifact challenge you’ve faced, and how did you overcome it? Share your experiences below—I’d love to hear how you’re pushing the boundaries in your post-production journey.


Leave a Reply