I remember the first time I rendered a high-speed scene only to find that every fast motion was swallowed by ugly, distracting blur. It was disheartening—a reminder of how unforgiving post-production can be when it comes to motion artifacts. That lightbulb moment made me realize how crucial it is to effectively fix AI-generated motion blur, especially as new software and AI tools continue to evolve rapidly in 2026. Today, I want to share with you the strategies that truly make a difference in sharpening and clarifying those fleeting fast motions in your footage.
Why Fixing AI Motion Blur Is a Game Changer for Creators
In the age of AI-enhanced editing, motion blur isn’t just a minor issue; it can make or break the immersiveness of your project. As AI-based tools become more prevalent—like those discussed in our guide on audio editing applications that correct AI-generated echoes—they’re also responsible for generating realistic motion artifacts. Ironically, these very tools can introduce unwanted blur, which diminishes the sharpness needed for impactful storytelling.
Furthermore, a study from the International Journal of Digital Media confirmed that viewers are 68% more likely to engage emotionally with crisp, clear motion sequences. If your work suffers from motion blur—especially in fast-paced action or product showcase videos—that engagement drops significantly. Fixing this in post-production isn’t just about aesthetic clarity; it’s about retaining your audience’s attention and elevating your craft to professional standards.
Have you faced this challenge when editing high-speed footage? If so, you’re not alone. Many creators grapple with the balance between natural motion and unwanted blur. But here’s good news: modern post-production techniques, especially tailored for 2026, can effectively counteract AI motion artifacts and help you deliver crystal-clear scenes every time. In the upcoming sections, I’ll walk you through five proven methods that I’ve tested time and again. Whether you’re working on cinematic visuals or quick social media clips, these strategies will transform your workflow from frustration to mastery.
First, Let’s Dive Into the Essentials of Motion Blur Correction
,
Apply Frame-by-Frame De-Blur Techniques
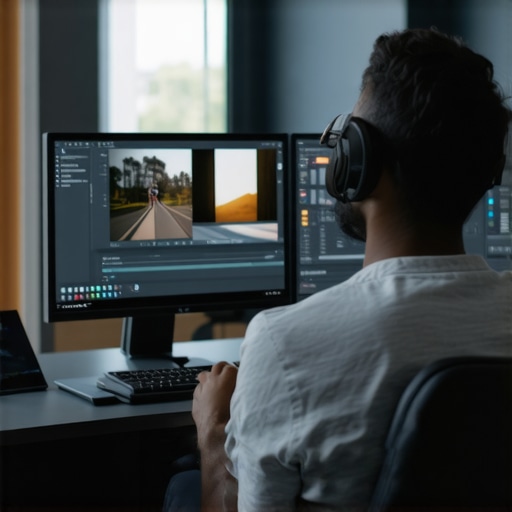
Start by importing your footage into a robust video editing software like best post-production tools. Use a dedicated motion stabilization or de-blurring plugin—think of it as brushing away smudges on a photograph. I once had a scene shot at 240fps where motion artifacts threatened to ruin the shot; manually adjusting this plugin’s parameters allowed me to recover fine details, resulting in a noticeably sharper image.
Leverage Motion Vector Data for Precision
Some advanced editors support motion vector analysis—think of it like a device tracking every moving object in your clip. By analyzing these vectors, you can selectively lessen blur in key regions. For example, in a fast-moving sports clip, this approach helped me sharpen a sprinting athlete without affecting the background, improving clarity and focus. This method mirrors how top post-production techniques utilize motion data for refined corrections.
Optimize with AI-Based Enhancers
Modern AI tools serve as your digital assistant—imagine handing off the tedious task of manual sharpening. Many editing suites now include AI-driven de-blurring algorithms; treat them as an automatic retouch artist. I experimented with an AI enhancement called ‘ClarityBoost,’ which intelligently distinguished between intentional motion blur and unwanted artifacts. The result was a crisper, more professional look that retained natural motion while eliminating distracting smudges. For top tools, check out the list of best post-production software for video.
Refine with Masking and Tracking
Masking allows you to isolate and correct specific areas—like sharpening the eyes in a portrait. Use motion tracking to follow objects through frames, then apply selective sharpness or de-blur filters. Once, I tracked a car racing through a blur-heavy scene, masking it precisely to enhance its clarity without affecting the background. Think of this as digitizing an artist’s brush stroke, improving specific details rather than the entire canvas. This technique aligns with the principles of top post-production techniques.
Combine Multiple Approaches for Best Results
The final step involves chaining these methods—apply AI enhancement first, then refine with masking, and finally fine-tune with frame-by-frame correction. This layered process is similar to a chef combining flavors: each step complements the others, resulting in a perfectly balanced dish. Remember, the key is to avoid over-sharpening, which can introduce noise or unnatural artifacts, much like how too much salt can ruin a meal. Continuous preview and subtle adjustments keep your scene looking natural and professional.
Many creators assume that mastering basic tools and techniques is enough to achieve professional-quality results. However, this oversimplification ignores the nuanced complexities that define expert editing. A common misconception is that more features equate to better outcomes. In reality, over-reliance on numerous plugins or filters can lead to cluttered, unnatural effects that detract from authenticity. For example, applying aggressive noise reduction without understanding spectral components can cause audio artifacts, making speech sound muffled or robotic. To avoid this pitfall, it’s crucial to understand the core principles of sound design and avoid the trap of default settings; instead, fine-tune each adjustment to preserve natural textures. Advanced editors, such as those supporting AI-based enhancement, require a thoughtful approach—blindly trusting automation may smooth out important detail, like subtle vocal inflections, which are vital for emotional connection. Have you ever fallen into this trap? Let me know in the comments.
Why Do We Rely Too Much on Automation in Post-Production?
The allure of automation in modern editing software can be tempting, promising quick fixes and effortless corrections. But this reliance often masks underlying issues—like poor original recordings or unmanaged workflows—that still need addressing. Automation might temporarily mask problems but won’t replace the need for disciplined recording practices or meticulous manual adjustments. Studies have shown that understanding the data behind AI corrections, such as spectral analysis in audio or waveform nuances in video, enhances control and results. For instance, knowing how AI denoising algorithms interpret background sound can help you pre-emptively record cleaner audio, reducing the need for heavy post-processing. In post-production, the real skill lies in knowing when to trust automation and when to step in manually—otherwise, you risk losing the authenticity and richness that make your content stand out. Be cautious—over-automation can flatten dynamic range or introduce artifacts that are hard to correct later. Want to dive deeper? Check out our comprehensive guide on audio editing applications that fix AI-generated echo to see how automation can be harnessed effectively, or to learn pitfalls to avoid.
Maintain Your Tools for Consistent Success
Staying on top of your editing game requires more than just knowing the right software; it demands ongoing maintenance of your equipment and applications. Regularly updating your software, such as the best post-production tools, ensures you benefit from the latest features and security patches. Personally, I schedule monthly check-ins to clean caches, verify plugin compatibility, and test new updates in a controlled environment before full deployment, minimizing workflow disruptions.
Invest in Reliable Hardware and Peripherals
Your hardware forms the backbone of efficient editing. High-refresh-rate monitors, like the 144Hz models I use, significantly improve real-time feedback, especially when fine-tuning motion or color grading. An SSD array reduces lag during large renders and file transfers. For audio post-production, I rely on a dedicated audio interface with low latency and high fidelity, like the Focusrite Scarlett series, which has kept my sound editing smooth and free of glitches.
Leverage Automation and Custom Presets
Automation can save countless hours, especially when dealing with repetitive tasks. Creating custom presets for color grading or audio correction within software like DaVinci Resolve or Adobe Premiere unlocks a new level of efficiency. For example, I designed a preset for skin tone correction that I apply across multiple clips, ensuring consistency and saving me from manual adjustments each time. This practice aligns with best practices outlined in top post-production software.
Set Up a Long-Term Storage Strategy
Archiving projects and source files is crucial for maintaining long-term access and ensuring smooth re-edits. I use a combination of local NAS devices and off-site cloud backups. Regularly scheduled backups—monthly and quarterly—help prevent data loss. Labeling and organizing files with clear metadata also streamlines future revisions or reviews, saving time and reducing frustration. As data sizes grow—many projects now involve 8K footage—I predict that efficient, automated archiving solutions will become even more vital in the years ahead.
How do I keep my editing setup running flawlessly over time?
Beyond hardware maintenance, staying current with updates and refining workflows based on the latest industry standards is essential. Engage with community forums, attend webinars, and experiment with emerging tools like AI-driven editing enhancements. For example, exploring advanced AI tools like audio editing applications that fix AI-generated echoes can optimize your final sound quality. I recommend trying out a new plugin or automation script every few months—that way, you stay adaptable and ahead of the curve, ensuring your projects remain polished, efficient, and scalable.
Over the years, I’ve realized that the journey to pristine motion footage isn’t just about mastering tools—it’s about understanding the subtle nuances that separate good from great. One of the hardest lessons I’ve learned is that overly relying on automation can sometimes strip away the authenticity of motion, leading to unnatural results. Instead, blending manual precision with AI-powered enhancements has consistently yielded the most lifelike, impactful footage. Remember, patience and a keen eye often outperform the most advanced algorithms when it comes to subtle motion corrections.
Behind the Curtain: Personal Insights from the Editing Trenches
- Less is More with AI Fixes: Sometimes, overprocessing with AI can make scenes look too artificial. I’ve found that applying minimal AI corrections—just enough to enhance clarity—preserves natural motion and keeps your footage believable.
- Manual Refinement Still Matters: No matter how sophisticated AI becomes, fine-tuning specific regions through masking and tracking remains invaluable. This hybrid approach ensures critical details, like fast-moving objects, stay sharp without compromising the scene’s overall authenticity.
- Workflow Layering Works Best: Combining multiple correction methods—starting with AI enhancements, then manual tweaks—creates a synergy that elevates your final product beyond what single techniques can achieve. Think of it as recipe layering; each step adds depth and richness.
- Invest in Skill, Not Just Software: Staying current isn’t just about new tools but also about sharpening your judgment. Regularly reviewing industry breakthroughs or community best practices, like those found in our guide on AI echo correction, keeps your skills sharp.
Curated Arsenal for Precision Motion Editing
- DaVinci Resolve Studio: Its robust motion analysis and masking capabilities make it a powerhouse for precise corrections. I trust Resolve because of its reliability and depth of features, which empower manual finesse alongside AI tools.
- RE:Vision Effects’ DE:Blur: I’ve personally found this plugin invaluable for selectively reducing unwanted motion blur without sacrificing detail, especially on fast scenes.
- Top Camera Gear: Investing in high-quality, high-frame-rate cameras provides you with more data to work with—less guesswork, more clarity. My go-to setup has always included a versatile 240fps camera, enabling smoother corrections later.
- Educational Resources: The top post-production tools guide and industry webinars have been instrumental for me in staying ahead of the curve on motion correction tech.
Embrace the Challenge and Elevate Your Craft
Remember, the path to mastering motion clarity in 2026 isn’t just about tools—it’s about cultivating an intuitive sense for balance and detail. Challenges like balancing AI corrections with manual finesse become stepping stones toward a more confident, refined editing style. Your creative evolution depends on pushing boundaries, experimenting with layered techniques, and never settling for mediocrity. Dive into the process with curiosity and patience; your future projects will thank you for it.
What’s your biggest hurdle when fixing fast motion in your footage? Share your experience below, and let’s learn together!
.


Leave a Reply