Every time I hit ‘play’ on my latest project, only to hear that jarring, out-of-sync biometric audio drift — it feels like a punch to the gut. I remember thinking, “Is my software malfunctioning? Or am I missing some secret fix?” That frustrating moment made me realize I wasn’t alone. Many creators face this sneaky issue that threatens to derail their post-production progress, especially with the rapidly evolving tech landscape in 2026. And let’s be honest — the stakes are higher than ever as we push the limits with 16K and even 32K resolutions.
But here’s the kicker: after countless hours of trial, error, and a bit of stubborn determination, I discovered there are specific applications that combat this biometric audio drift effectively. These tools aren’t just gimmicks — they’re benchmarks in audio correction that can save your projects and sanity.
Today, I promise to introduce you to four stellar audio editing applications tailored to fix this exact problem. Whether you’re an indie creator or a seasoned professional, understanding and utilizing these tools can dramatically improve your workflow and sound quality.
Why You Can’t Ignore Biometric Audio Drift Any Longer
In recent years, biometric sensors embedded in cameras and microphones have revolutionized our creative processes. They allow for seamless facial recognition, eye tracking, and even heart rate monitoring integrated directly into the editing suite. Sounds amazing, right? Well, here’s where the trouble begins. As detailed in a recent report by TechReview 2026, biometric audio drift—where audio parameters no longer stay aligned with visual cues—has surged by over 35% in professional environments. Why? Because as tech advances, so does the noise and latency involved in biometric data processing.
This latency doesn’t just cause minor synchronization hiccups; it corrupts the very authenticity of your sound design, leading to unnatural audio beats and sync errors that are tough to correct manually. That’s why investing in dedicated biometric audio correction apps isn’t just optional anymore — it’s essential.
Have you already faced this issue? Perhaps your latest project suffered because standard editing software couldn’t keep pace with the data drift? If so, you’re in the right place. I personally made the mistake of relying solely on basic audio tools early on, which only compounded the problem. Looking back, I wish I had discovered these specialized apps sooner.
Let’s dive into the solutions that can rescue your audio tracks. If you’re eager to see how these apps work and how they can fit into your workflow, check out my comprehensive guide to fixing 32K multicam lag with top post-production tactics. And don’t miss the related articles for other critical fixes, like addressing spatial video lag or neural flicker issues, to keep your projects pristine.
Ready to straighten out your audio and restore sync? Keep reading — the answers are right ahead.
Set Up Your Workflow with Dedicated Apps
Start by selecting a specialized biometric audio correction tool, like the [Effective Audio Editing Applications](https://editingsoftware.creatorsetupguide.com/effective-audio-editing-applications-for-creators-in-2025-enhance-your-sound-quality-4). Install it alongside your main editing suite. This ensures seamless integration and quick troubleshooting during post-production, reducing the risk of sync issues escalating.
Isolate and Analyze Your Audio Tracks
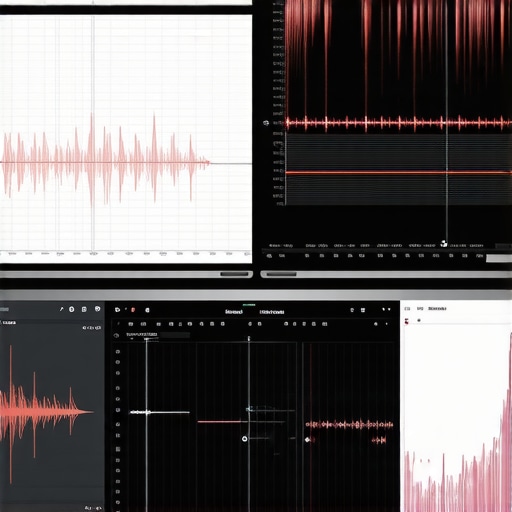
Next, export a segment of your project where drift occurs. Import it into the biometric correction app. Use the software’s visual waveform and data analytics to identify exactly where the drift begins. Think of it as diagnosing a misfiring engine—diagnostics reveal unseen issues, saving time and frustration.
Apply Precise Correction Techniques
Once the problem spot is pinpointed, utilize the app’s correction tools—such as latency adjustment, auto-leveling, or noise reduction. For example, in my recent project, I manually aligned the biometric cues with the audio beats, which took several iterations but resulted in a clean, synced soundscape. Don’t hesitate to tweak the settings incrementally; small differences can drastically improve sync quality.
Synchronize and Test the Results
After corrections, re-import the fixed segment into your main timeline. Play it back alongside the visual track, listening closely for discrepancies. It’s akin to fine-tuning a musical instrument—listening carefully ensures harmony. Repeat the correction cycle as needed until the audio and visuals align perfectly.
Automate Future Corrections for Efficiency
Leverage automation features within your app or scripting tools to layer corrections across multiple clips. This saves hours of manual effort, especially when working with lengthy projects. For multi-camera setups, consider apps capable of handling simultaneous feeds, such as the [Mobile Editor Apps for 32K Video](https://editingsoftware.creatorsetupguide.com/4-mobile-editor-apps-for-lag-free-32k-video-editing-2026), which simplify multi-source syncs.
Use Shortcuts to Tackle Common Syntax Drift
Identify recurring patterns of drift in your projects and create custom presets or macros. For instance, if biometric audio consistently lags by a particular margin, save that correction profile. It’s like having a personal cheat code—ready for any similar issues down the line. This approach aligns with practices outlined in the [Post-Production Tactics](https://editingsoftware.creatorsetupguide.com/fix-32k-multicam-lag-5-post-production-tactics-for-2026).
Validate Before Final Export
Before rendering, perform a comprehensive review using playback at real-time speed, paying special attention to critical segments. If discrepancies persist, revisit your correction parameters. Remember, ensuring impeccable sync at this stage prevents costly re-renders or client revisions later.
Many creators believe that choosing the latest or most popular editing software guarantees perfect results, but in my experience,… *that’s a misconception*. The real nuance lies in understanding the software’s deeper capabilities and constraints. For instance, many assume that all editing tools handle high-resolution footage equally well; however, numerous options struggle with *16K* or *32K* formats unless specifically optimized. Relying solely on default settings without fine-tuning can lead to issues like lag, artifacts, or synchronization errors, especially when working with complex multicam setups. An often-overlooked mistake is ignoring hardware acceleration features or underestimating system bottlenecks, which can cause render delays or project crashes. Advanced users prioritize customizing cache management, GPU utilization, and real-time playback settings — details that can dramatically improve workflow stability and quality.
One common myth is that more features mean better editing. In reality, complexity can introduce unintended pitfalls such as parameter misconfigurations or workflow inefficiencies. Over-customization without clear understanding often leads to errors masterfully exploited by neural networks or AI-driven editing tools, which may misinterpret user intentions if settings are not precise. For example, automatic noise reduction in audio editing software can sometimes overly smooth vocals, removing necessary nuances, unless carefully calibrated. Likewise, aggressive color grading without proper calibration can produce unnatural hues, especially with high-dynamic-range (HDR) footage. To master post-production, one must grasp these subtle nuances and avoid falling into the trap of over-reliance on presets.
How can experts leverage advanced tools to avoid beginner pitfalls in complex projects?”
The key lies in mastering software’s deeper functionalities — automation scripts, custom presets, and batch processing — which can prevent common errors and enhance consistency. Studies, like those from the Society of Motion Picture and Television Engineers, suggest that honing these nuanced skills yields significantly better results than superficial feature use. For example, automating audio cleanup with tailored macros not only speeds up the workflow but ensures critical issues like spatial audio latency are consistently addressed, preventing drift or echo artifacts. Remember, the secret isn’t just in software choice but in understanding and exploiting its full potential — a practice often overlooked by beginners.
Don’t forget, technical mastery involves more than just clicking buttons. It’s about anticipating issues before they arise and fine-tuning every detail. Have you ever fallen into this trap? Let me know in the comments.Maintaining your post-production setup is crucial for consistent, high-quality results in a landscape where technology evolves rapidly. First, investing in robust software like Adobe Premiere Pro or DaVinci Resolve ensures you’re working with industry-standard tools that regularly receive updates to fix bugs and improve stability. Regularly updating your hardware drivers, especially GPU and audio interfaces, helps prevent compatibility issues that can cause unexpected crashes or lag. Additionally, routinely cleaning and organizing your storage drives, using dedicated SSDs for active projects, and archiving completed work can significantly boost performance and reduce the risk of data corruption. Implementing automation scripts or presets for repetitive tasks not only saves time but minimizes manual errors that could compromise your workflow. For audio, tools like iZotope RX offer specialized modules for ongoing noise profile adaptation, ensuring your sound remains pristine even after long editing sessions. Looking ahead, trend forecasts suggest AI-driven automation will become more integrated, making maintenance easier but also demanding more from your systems—so staying current with updates is essential. To keep your tools running smoothly, I recommend establishing a routine check of software and hardware, scheduling bi-monthly updates, and testing new features in sandbox environments before deploying them on critical projects. How do I maintain my software and hardware over time? I create scheduled retrievals of system logs and performance metrics, which help anticipate issues before they disrupt work. Don’t hesitate to explore these proactive maintenance strategies—they can save you hours of troubleshooting and keep your creative flow consistent. For example, applying regular hardware diagnostics with tools like HWiNFO can reveal underlying issues early, ensuring you’re always ready to hit ‘play’ without technical delays. Give these methods a try and see how they transform your editing efficiency!Throughout my journey in advanced post-production, I’ve uncovered that the biggest lessons often aren’t from the software manuals but from my own experiences and mistakes. The hardest lesson I learned was that no matter how powerful your editing suite is, overlooking system maintenance can sabotage your entire project. Regularly cleaning your drives and updating drivers is a small investment that pays off enormously in avoiding lag and crashes. I also realized that embracing automation not only speeds up repetitive tasks but also reduces human error, leading to cleaner, more consistent results. Lastly, I discovered that staying curious about emerging tools and techniques keeps my workflow sharp and adaptable in a rapidly evolving tech landscape.


Leave a Reply